
How can I not post a biryani when it’s the king of spices.....well, I have been trying out biryani for a couple of years now. Aj adores biryani. It’s the first dish he would order in any Indian restaurant. For me, initially, getting the right flavour was very difficult, but as they say practise makes perfect J.
Now for some gyaan on biryani. Usually, there are 2 methods to cooking biryani- one is preparing the meat and rice separately and then mixing the two by means of dum, called pakki dum biryani. The second method is to cook the meat with the rice which is what I’m going to give you a demo of. This is called kachi dum biryani. What is “dum” - in authentic method the layered meat and rice were cooked by steaming over coals in a sealed container. Don’t worry, I will demo dum minus coal and almost sealedJ.
Biryani has a lot of varieties from Arabic to Hyderabadi to Malabar. The recipe here is for Malabar biryani. The highlight of this biryani is the rice used. We use kaima rice and not the regular basmati. This variation of basmati comes from the paddy fields lying low beside the Western Ghats in Kerala. But of course you can always use good ol’basmati. No issues there!
I’m cooking chicken but you can use the same recipe for lamb also with minor variations that I will mention in tips n tricks section.
If you have a hotplate, use that for dum process. For those like me who love the fire, heat a pan or tava and place the biryani vessel in that.
Now down to the recipe....
Ingredients: (serves 6)
Rice- 3 ½ cups of basmati or kaima rice
Chicken - (1200grams) whole (remove skin and cut into large chunks as in picture)
Onion- 7 medium sized finely sliced
Garlic- 12 cloves coarsely ground
Ginger- 3 pieces (2 inches) coarsely ground
Tomato- 4 medium size finely chopped
Green chillies- 8 to 10 coarsely ground(change as per taste but minimum 8)
Mint leaves- 1 cup finely chopped
Coriander leaves/cilantro - 1 cup finely chopped
Garam masala - 3 teaspoons (use freshly ground for best taste)
Yogurt- 1/2 cup
cashew nuts - 8 pieces finely ground into powder
cashew nuts - 8 pieces finely ground into powder
Lime juice- from 1 whole lime
Ghee (Indian clarified butter) - 3 tablespoon
Milk- 3 tablespoon
garam masala powder- 1/2 tablespoon+1tsp for rice
garam masala powder- 1/2 tablespoon+1tsp for rice
Whole Spices required:
Fennel seeds- ¼ teaspoon
Cinnamon stick- 3 pieces of 1 inch each
Clove- 6
Green cardamom- 2
Mace- 1 piece
Aniseed- 2 small piece
Bayleaf- 1
Garnish:
Oil for frying
Onion- 1 medium finely sliced
Cashew nuts- 10
Rasins- 15
Method:
1. Soak rice in water for 3 hours.
2. Boil rice in water, salt and 1 teaspoon garam masala for 15mins, drain and keep aside. The rice will break when you press between your fingers but won’t be fully cooked. That’s the consistency we want. Do not over do it.

3. Clean and cut chicken into large chunks. Make slits all over as shown in picture.

4. Heat ghee in a vessel which is big enough to hold chicken and rice, has a heavy lid and a thick bottom.
5. Toss in whole spices and let the aroma come out.
6. Add onion and salt. Cook till onion is almost transparent. Reduce flame to medium low.

7. Add freshly ground ginger and garlic and sauté till the onion is well done (at the verge of turning golden).
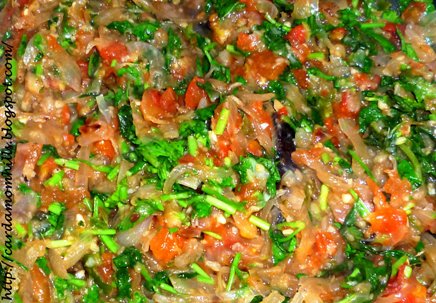
8. In goes the tomato and green chilli. Now let the mixture cook till tomato gets mushy.

9. Next toss in chopped mint and coriander leaves. Cover lid and cook for ten minutes.
10. Mix in the yogurt, cashew nut powder and garam masala powder.
11. Add lime juice. Adjust salt.

12. Add chicken pieces and mix well into gravy, covering pieces in gravy generously. Close the lid and cook on a medium flame till water starts coming from the chicken. then mix well and add rice as below.

13. Now slowly spread the rice on top in a leveled layer

14. Sprinkle milk over the rice throughout.
15. Spread a kitchen towel on the mouth of the vessel and place the lid over that. So we have an almost sealed atmosphere in thereJ.
16. Now heat your pan or tava on high and place vessel in that. Let the flames remain high for 2 mins. Then reduce to minimum and let it cook for 45-50 mins.
17. Meanwhile, heat oil to deep fry items for garnish.

18. Deep fry onions till brown.
19. Next fry cashews till golden.
20. And last rasins for just a minute.
21. When the long wait is over, mix the rice and meat slowly part by part.
 |
| The first mouth watering scoop!!! |
22. Garnish with some coriander and deep fried items before serving hot.
Tips n Tricks:
1. If you plan to make lamb:
a. Use very tender meat.
b. Marinate & refrigerate overnight (Marinade: yogurt -1 dollop, white vinegar- 1 tablespoon, garam masala powder- 1 teaspoon).
c. Cook rice for only 10 mins.
d. Cook in dum for 1 hour 15mins.
Wow...this looks delicious...chicken biryani...mmmm can imagine how it would taste with all those wonderful spices. Thanks for sharing..salivating now :p
ReplyDeleteexcellent recipe! I think I'm gonna love it! I'll give it a try! thanks! :D
ReplyDeleteOh yeah, this is right up my alley. I would love to cook this tonight. It looks easy enough. Lamb biryani is always the first thing I order in Indian restaurants. Can't wait to try making it at home, thanks for sharing!
ReplyDeleteGuyz, let me know how u liked =)
ReplyDeleteI love the addition of the cashews in this!
ReplyDeleteyou do have SOME patience to be clicking all those photographs. i'm yet to go through the recipe but my only problem with ghee biryani is that it's so heavy and burpy. oh yeah but no denying the taste. (why can't someone make good food for me the way I WANT IT.) i'd love you to follow my blog: kitchen-morph.blogpot.com; i can give you personalised motivation to foray into baking!
ReplyDeleteThanx everyone for those great comments!
ReplyDelete@kitchen morph: well, wats a photo tutorial without photos :) n u got it, ur on my blog roll...as for the ghee its just 3 spoons on ghee but if u feel even thats heavy u cud always reduce the quantity exchange with olive oil and not use the seasoning :)
Wow! I needed this! Always love learning new spices and ways to use them.
ReplyDeleteOmg!!!That looks divine!!!
ReplyDeleteThat looks sooooo good! I suppose I'll have to make it now that you've made me hungry for biryani. Drool....
ReplyDeleteOh geez, you have my mouth watering and I'm not even hungry right now. I've never tried to make Biryani and I love all the ingredients that you have in here. It's on my list.
ReplyDeleteThanx all!
ReplyDeleteLove it!
ReplyDeleteThis goes into my recipe box! Thanx for sharing!
One of my favorite dishes, but have yet to make it. I'm saving this recipe!
ReplyDelete